How Solar Panels Are Installed on a Roof
Do you want to start using solar energy to power your home? With residential solar panel installations growing by 30- percent over 2020, it’s a safe bet a lot of roofs have come under the scrutiny of solar installation companies.
Installing solar panels on your roof can provide you with a clean energy source for your home. However, installing solar panels can be a huge task. You have to consider so many different things with solar panel installation.
The best way to learn about the process is to keep reading. Here, we’ll cover the basics on how solar panels are installed on the roof.
Organize Your Materials For Solar Panel Installation
Organizing your materials is the key to a successful solar panel installation. In order to have the solar experience you’ve been dreaming of. Make sure you have all of the necessary tools and hardware before starting your project.
Review the instructions provided by the solar panel manufacturer to ensure a proper installation. To avoid damage to your roof and solar panels, use caution when removing old shingles and installing new ones.
Build Scaffolding
Most people don’t know how solar panels are installed on a roof. It’s a fairly simple process, but it does require scaffolding. The scaffolding is necessary to provide a stable platform for the workers to stand on while they install the panels.
Without scaffolding, the installation process would be much more difficult and dangerous. The process begins by attaching the scaffolding to the side of the house.
The scaffolding provides a platform for the workers to stand on while they install the panels. The panels are then attached to the roof using screws and bolts.
Install The Solar Panels
Solar panels are installed on a roof by first measuring the roof and then cutting the panels to size.
The panels are then attached to the roof using brackets and screws. The screws are driven into the roofing material and then the panels are attached to the screw heads.
Finally, the electrical connections are made, and the system is tested. The panels are then connected to each other and to the inverter using cables.
Place Solar Panel Mounts
Solar panels are usually mounted on the roof of a house or building. Mounts are generally placed at the four corners of the solar panel, although some mounts may be placed in the middle of the solar panel.
The mounts are usually attached to the roof with nails or screws. The solar panel is then attached to the mounts with bolts.
Adjust the Stanchions
To adjust the stanchions, first loosen the nuts at the base of the stanchion with a wrench. Next, raise or lower the stanchion to the desired height and retighten the nuts.
Repeat this process for all of the stanchions. Finally, check that the stanchions are level before proceeding to the next step.
Wire The Solar Panels
Solar panels are installed on a roof by first attaching them to the roof with brackets or by laying them on the roof and attaching them with clamps.
The panels are then connected to each other with copper or aluminum wires, and the wires are connected to an inverter.
Install Solar Inverter
Installing solar inverters is a critical step in the process of installing solar panels on a roof.
Solar inverters take the direct current (DC) electricity produced by the solar panels and convert it into the alternating current (AC) electricity that is used by most homes and businesses.
This conversion is essential for solar panels to be able to power the home or business. Solar inverters are typically installed by a qualified electrician.
Bond Solar Inverter And Solar Battery
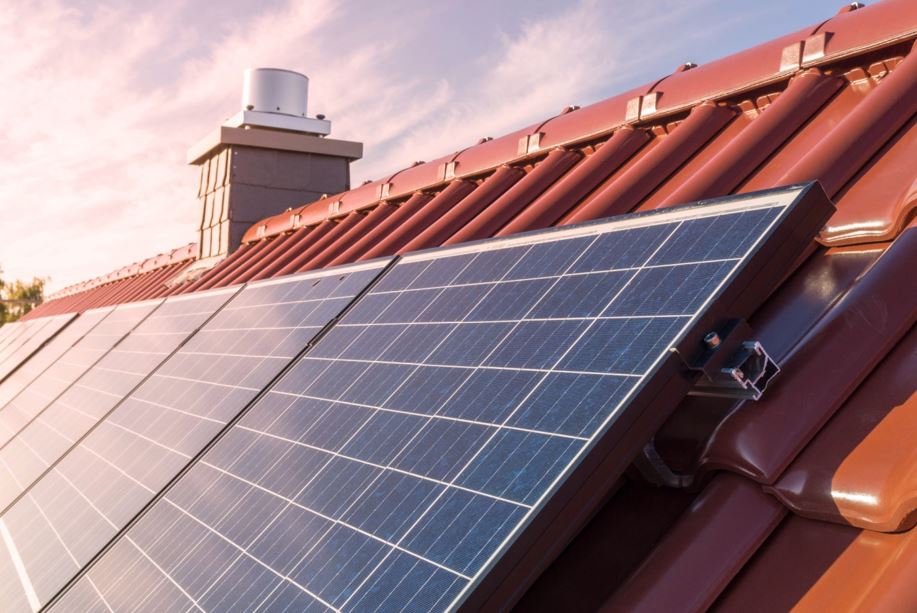
Solar panels are usually fitted to the south-facing side of a pitched roof, at an angle of between 15 and 45 degrees from the horizontal, to make the most of the available daylight.
They can also be installed on a flat roof, but this usually means fitting them on a frame to raise them above the level of the roof. A typical installation might have between 12 and 24 panels, each measuring around 1 meter by 2 meters.
The panels are usually fixed in place with brackets and screws, and then wired together and connected to the inverter. The solar batteries store any excess electricity generated by the panels, so they can be used when the sun isn’t shining.
Connect The Inverter to The Consumer Unit
The solar panel installation process requires a few key components in order to work. You’ll need to install the panels themselves. This can be done by mounting them on your roof or on the ground.
Also, you’ll need to connect the inverter to your home’s electrical system, typically through the consumer unit.
Start And Test Solar Panels
After the solar panels are mounted on the roof, the next step is to start and test the solar panels. Once the panels are connected and the inverter is turned on, the solar panels will start generating electricity.
The system is tested to ensure that it is generating electricity and that the panels are charging the batteries.
Solar Panel Maintenance
Solar panels require little to no maintenance after they are installed. Solar panel maintenance generally only requires occasional cleaning and inspection.
Cleaning is necessary to keep the panels free of dirt and debris that can prevent the panels from absorbing sunlight. Inspection is important to check for any damage to the panels that could prevent them from working properly.
This is How You Install Solar Panels
After reading this article, you should now have a better understanding of how solar panels are installed on roofs. The solar panel installation process is quite simple.
If you’re considering getting solar panels for your home, be sure to do your research and get multiple quotes from different contractors. Just to ensure you’re getting the best deal. The whole process usually takes a few hours.
Did you find this article helpful? Check out the rest of our blog for more!